7 Types of Makeup Sponges and How to Use Them
No matter what type of makeup you wear, there’s almost always one constant: You apply it with some sort of sponge (or at least you should). Whether you’re working with cream blush or liquid foundation, your makeup will go on smoother and last longer when you use a sponge to apply it. But not all sponges are the same, so you want to make sure you know how to use each kind correctly—and that means knowing which sponge is best for which products and tools. Here are seven different types of makeup sponges and how to use them properly.
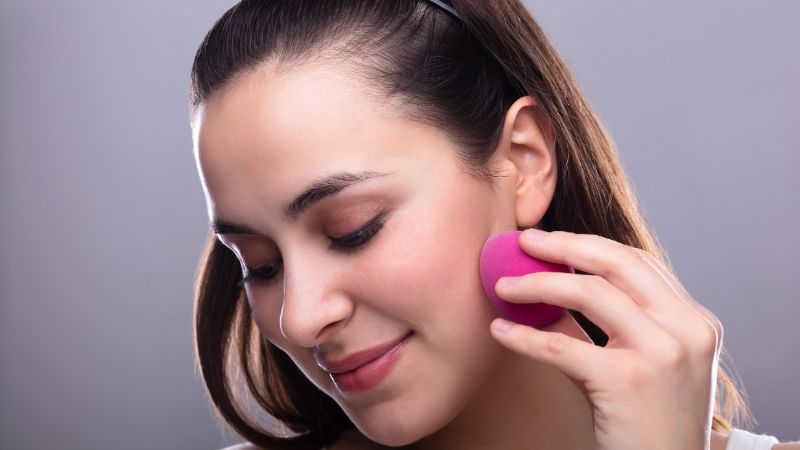
1) Round Sponge
The round sponge is probably the most popular type of makeup sponge. It’s soft, cosy, and versatile, making it perfect for a variety of skin tones and makeup products. Plus, it’s easy to use – just wet it, squeeze out the excess water, and apply your makeup.
The round sponge’s soft, bouncy texture makes it great for applying a variety of makeup products including liquid foundation, blush, powder, and cream-based cosmetics. The only major drawback is that it does not work well with some types of liquid foundations – these might leave an uneven finish because there are no edges for control. For example, I have found that using a round sponge to apply liquid foundation often results in patches or streaks where too much product has been applied. To avoid wasting your expensive foundations or creams, you can use a flat top buffer brush instead.
2) Flat Sponge

A flat sponge is great for packing on product and can give you a full coverage look. It’s also ideal for contouring since you can use the flat edge to create sharp lines. If you have a cosy skin tone, a flat sponge will help you achieve an even application.
You can use a flat sponge with powder or liquid foundation. You just apply it on your face using sweeping motions, then buff any edges until you have an even layer. Don’t forget to tap your skin once you’ve applied your base so you get rid of excess product. If you’re applying liquid foundation, try applying it directly on your face with a brush first before buffing it in with a flat sponge. This will help reduce streaking and give you a smooth finish. Try placing some tape on both sides of the flat edge for extra precision if that’s what you need for certain areas, like around your nose and mouth, or under your eyes for concealer application.
3) Egg Shape Sponge

The egg shape sponge is great for blending out contours and getting into small spaces like the inner corner of the eye. It can also be used to apply highlight to the cheekbones. To use, wet the sponge and then squeeze out the excess water. Next, use a stippling motion to apply makeup.
Don’t have an egg shape sponge? No problem. A regular makeup sponge can be used just as effectively, though you will need to squeeze it a bit before applying your foundation so that it doesn’t absorb too much liquid. If you want more precise results with your application, use a brush or stippling brush instead. For best results, you should use two different types of sponges—one for liquid products like foundation and another for powder-based products like blush or highlighter. This way you’ll get flawless coverage every time.
4) Silicone Sponge
![[6 pcs] TOP Quality Silisponge Silicone sponge Cosmetic Puff Make-up Applicator | eBay](https://i.ebayimg.com/images/g/ef4AAOSwAbVeO0vV/s-l500.jpg)
The first type of makeup sponge is the silicone sponge. This sponge is great for a few reasons. First, it doesn’t absorb any product, so you don’t have to worry about wasting your makeup. Second, it’s easy to clean – just use soap and water. Third, it’s perfect for applying foundation, concealer, and other liquid products. Fourth, it won’t leave any streaks or lines on your face. Fifth, it’s hypoallergenic and good for sensitive skin. Sixth, it’s durable and will last a long time. Seventh, it’s affordable and easy to find in stores.
One downside of silicone sponges is that it’s a bit difficult to use, especially if you’re just starting out with makeup. You have to spend some time figuring out how best to apply your foundation or concealer. Another potential downside is that it can be hard to keep clean. Soap and water are fine for most uses, but if you want a really clean sponge, then you’ll need something stronger like bleach. However, these downsides are more than worth it in our opinion – because when used properly, silicone sponges offer a number of benefits that make them better than traditional makeup sponges. As long as you take care not too waste too much product, they’re great for your wallet too.
5) Beauty Blender

The Beauty Blender is a makeup sponge that comes in the shape of an egg. It can be used for foundation, concealer, powder, and cream blush. To use, wet the sponge and then squeeze out the excess water. Dab the sponge into your makeup and then apply to your face in a stippling motion.
If you want a more precise application, opt for a smaller sponge, like those used in eyeshadow. They typically come in three different sizes: large, medium, and small. For example, use a larger sponge for applying base products all over your face and then apply eyeshadow with a small sponge. If you have hooded eyelids or dark circles, you can use an orange stick to apply concealer under your eye area so that it blends seamlessly into your skin tone without ruining your makeup look.
6) Two Sided Sponge

The two-sided sponge is great for applying foundation evenly all over the face. The flat side can be used for larger areas while the pointed side is perfect for getting into smaller spaces, like around the nose. Plus, it’s easy to clean! Just make sure to replace it every few months.
One side is flat, while one side is rounded. This type is probably one of the most popular makeup sponges you can find! It’s great for applying liquid foundation or a full coverage cream. Using it means you can quickly and easily apply your base make up without any streaks! Plus, these sponges are also really easy to clean; just wet them with warm water after use, rub gently with soap, rinse again then leave to dry out on a towel before using again. You should replace your sponge every 3-4 months as they do get dirty quite quickly.
7) Triangle Sponge
The triangle sponge is the most versatile type of makeup sponge. It can be used for applying foundation, concealer, powder, and blush. The pointed end is perfect for getting into small areas like the inner corner of the eye, while the flat sides are great for contouring. To use a triangle sponge, simply dampen it with water, squeeze out the excess, and then bounce it across your face in a patting motion.
The next sponge on our list is a variation on a triangle sponge—the wedge. Wedge sponges are essentially triangle sponges cut into halves or thirds. They’re also great for patting or stippling your foundation, but unlike triangle sponges, they can also be used in circular motions to blend out large areas of product. Wedge sponges are best used with cream or liquid foundations as they can soak up too much water if you use them with powder products.