How to Smudge Your Eyes for the Perfect Smokey Eye
Smokey eyes are one of the most popular ways to make your eyes stand out, but it can be difficult to know how to smudge your eyes just right if you’ve never done it before. This step-by-step guide will show you the easiest way to create the perfect smoky eye, and then give you some tips on how to recreate this look on a regular basis once you’ve got it down pat. Don’t leave home without it!
1) Step 1 – Pick the right color

When it comes to smudging your eyes, you want to make sure you pick the right color. A smokey eye should be a few shades darker than your natural skin tone. If you have fair skin, go for a light brown or grey. For medium skin, choose a dark brown or charcoal grey. And if you have dark skin, opt for a black or deep plum shade.
To apply, you can use your finger or a brush. If you’re using your finger, put a drop of eyeliner on it and then use that same finger to rub along your lash line. Alternatively, use a brush. Dip your liquid eyeliner in water so it’s not as thick and is easier to apply. Then take some product on your makeup sponge or brush and tap along your lash line until you have an even coat of color with no streaks.
Whether you choose a liquid, gel or pencil liner will depend on your preference. Liquid eyeliner is great if you like very precise lines, but it can take longer to dry and may smudge if you put too much pressure on it. Gel liner dries faster than liquid liner and is easier to apply, but it’s more likely to get stuck in your eyes when it does dry. If you have super sensitive eyes or want a softer look, opt for pencil eyeliner instead. Pencil liner goes on quicker than gel or liquid liner and also makes touch ups quick and easy.
2) Step 2 – Prepare your eye area
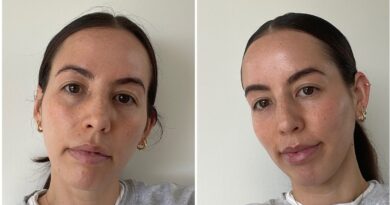
Before you start any eye makeup look, it’s important to prep your eye area. This will help ensure that your makeup goes on smoothly and evenly. To do this, start by applying a light layer of foundation all over your lid and under-eye area. Then, use a concealer to cover any dark circles or blemishes. Once you’ve done this, dust a translucent powder all over your lid to set everything in place.
Then, take a clean, fluffy blending brush and a matching eyeshadow color. Dip your brush into some water, and then gently sweep it over your eyeshadow. This will help make your shadows more vibrant by creating a smooth base on which to layer. Then, simply pat on any remaining powder with another fluffy brush so that everything is well-blended and uniform.
3) Step 3 – Use an applicator pad

After you have gathered all of your materials, it is time to begin smudging your eyes. To start, take an applicator pad and gently press it against your eyelid. Using a light hand, move the pad back and forth until you have achieved the desired look. You can also use your fingers to smudge the eyeshadow if you prefer. Be sure to blend well so that there are no harsh lines.
To ensure that your smudged eyeshadow lasts all day, set it with a bit of loose powder. First, make sure you close your eye tightly so that no excess powder will enter it. Then use an eyeshadow brush to gently sweep a bit of loose powder across your lids from top to bottom. It is important not to go overboard with your eyeshadow application because too much can be overpowering and sloppy looking. Finally, you can complete your smudged eye look by curling your lashes and applying mascara if desired. It may seem like there are many steps involved in creating a smudged eye look, but once you become practiced at using proper technique, you should be able to do it in no time.
4) Step 4 – Pick up product with your finger tips

Now that you have your brush, it’s time to pick up some product. The best way to do this is with your finger tips. Dip your finger into the pot of shadow and then tap off the excess onto the back of your hand. You want to make sure you don’t have too much product on your brush, otherwise you’ll end up with a muddy looking smudge.
Now, take your ring finger and run it over a flat surface (it doesn’t have to be flat) like your palm. This will help remove excess product. You want to be sure you don’t apply too much product otherwise you’ll get that un-natural looking white ring around your eyes when you’re done smudging. If you do go overboard with product on your brush, wipe some off onto a paper towel or coffee filter.
Now, let’s start with an easy smudge. I like to apply my eye shadow as a base and then go back in with a darker color once that is dry. To do that, I’ll pick up some pigment with my finger tips, dabbing lightly at first so it doesn’t get too messy. Then, I’ll quickly drag it from my lash line outwards toward my crease while pressing slightly and angling downward. This will give you an instant smoky look! Be sure not to overdo it though; if you apply too much pressure or do more than one layer your eyes can end up looking very dark and unnatural looking.
5) Step 5 – Extend outwards

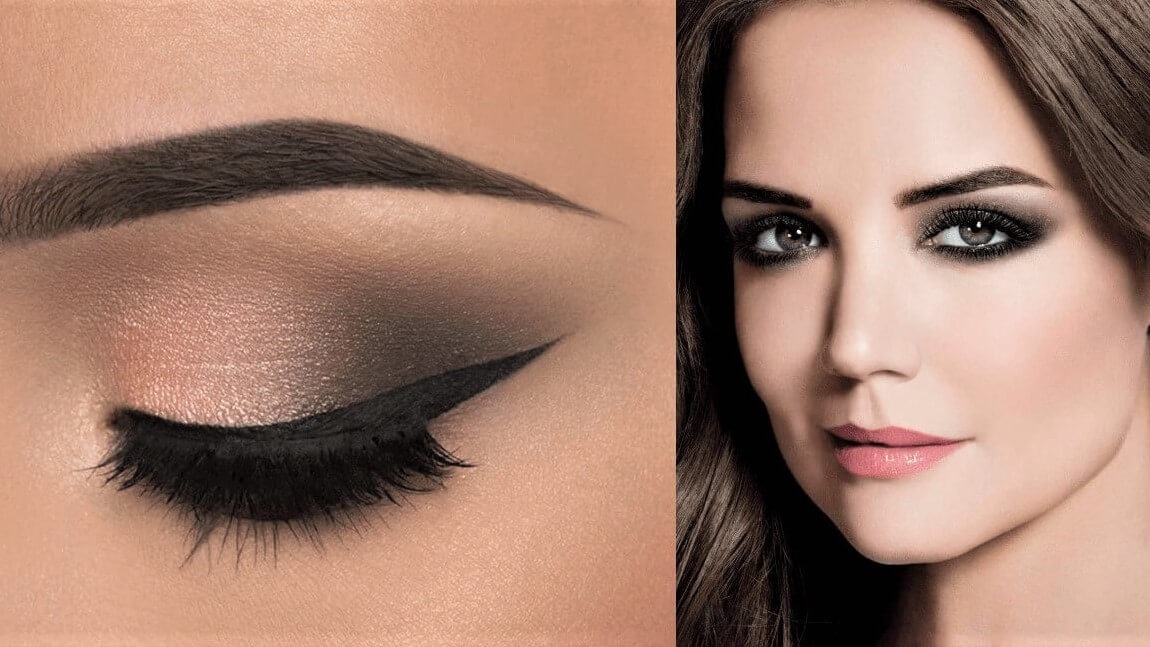
Starting at the innermost corner of your eye, draw a line along your lash line with a pencil or gel liner. Then, using a small, dense brush, blend the line outward. The key here is to not go too heavy-handed – you can always add more product if necessary. Next, take a slightly larger brush and blend the edges of the line to create a soft, diffused look. Finally, using a clean cotton swab or Q-tip, lightly smudge the lower lash line for added depth and dimension.
If you’re looking for more drama, apply a darker shade along your lower lash line and blend in with a brush. This will give your eyes depth and definition. To create an even bolder look, try taking liner on a brush or finger and drawing it out beyond your lash line as if extending eyelashes. You can also use waterproof eyeliner—it doesn’t smudge as easily when touched by water or oil, which means you can go swimming without worrying about ruining your look!